Introduction
This guide will teach you the following:
- How to bulk import orders
- How to bulk quote orders
- How to bulk print labels
- Things to look out for / avoid doing to ensure a smooth operation
This guide will teach you the following:
1. Log in to your Inex account.
2. Click on the drop-down menu next to your email and select “Order Management”.
Step 1: Download the Instructions and the Template
Step 1.1: Click “Upload Instructions” for details instructions on how to upload your shipments. Then click “Download Template” which you will transfer your data onto.
Step 2: Familiarize yourself with the template
Step 2.1: In the template, there are three examples of complete shipments: a single-piece shipment, a multi-piece shipment, and an international shipment. As shown in Figure A, the first row of each shipment type (rows 3, 5, & 10), is where shipping info (ex. “shipperCompanyName” “shipperPersonName” “shipperAddressLine1”) is located.
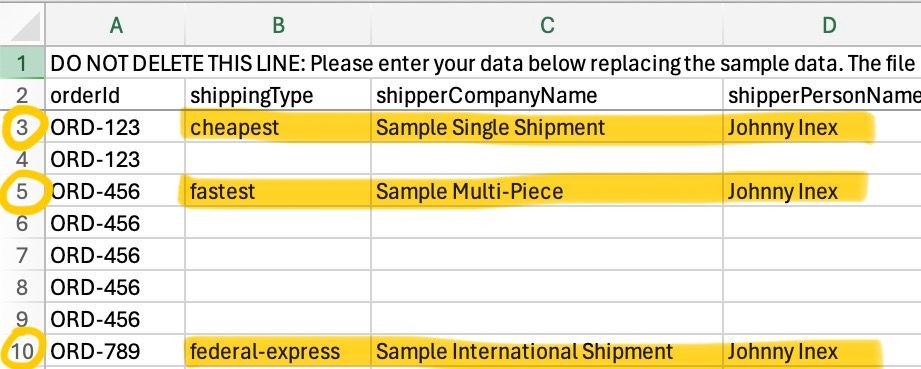
Figure A
Step 2.2: Rows below the shipping info row, which match its Order Id (shown in Figure B), contain package details (beginning at column AI – shown in Figure C). Each of these types of rows represents an individual package. Thus, for a single-package order, the template will have two rows (one for the shipping info, and another for the package). A multi-piece order that has three packages will have four rows in the template (one for the shipping info, and three for the packages). Once you are familiarized with how to input your data, DELETE the template data.
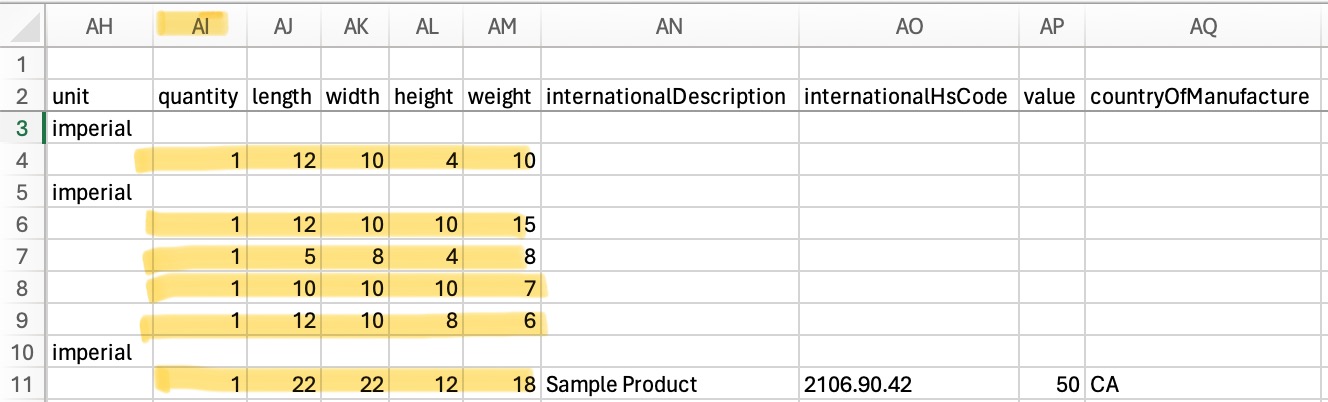
Figure C
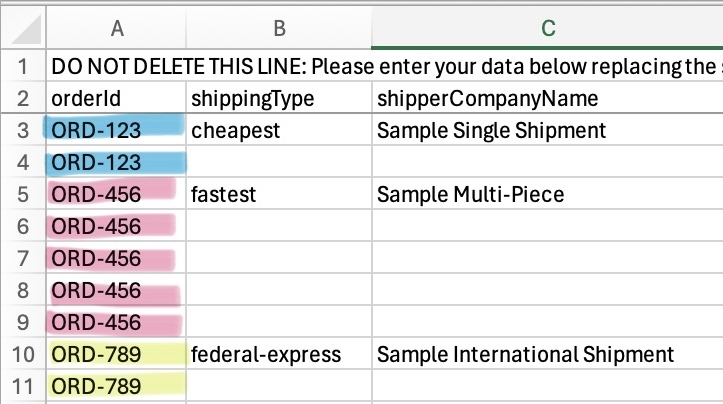
Figure B

Step 3: Use the Instructions PDF and the .CSV Template to transfer your data onto the template correctly. Export your data as a CSV file.
Step 4: Import the CSV file with your shipment data by clicking “Import Orders”.
Step 5: Drag, drop, or browse for your CSV file.
Step 6: Refresh the page. If your orders do not appear again, refresh the page again.
Step 7: You can always update a specific order by clicking on a shipment (the row will turn blue when you hover on it). A window labeled, “Modify Quotation,” will pop up and you will be able to adjust the shipment’s details.
Step 1: When ready to quote, you can either “Select All,” or select specific shipments you would like to quote at once by using the checkboxes. You can select up to 15 orders at a time.
Step 2: You can also quote a specific order by clicking “Quote”.
Step 3: In the drop down on the right, select “Quote” and then confirm with the ![]() button to the right (shown in Figure D)
button to the right (shown in Figure D)
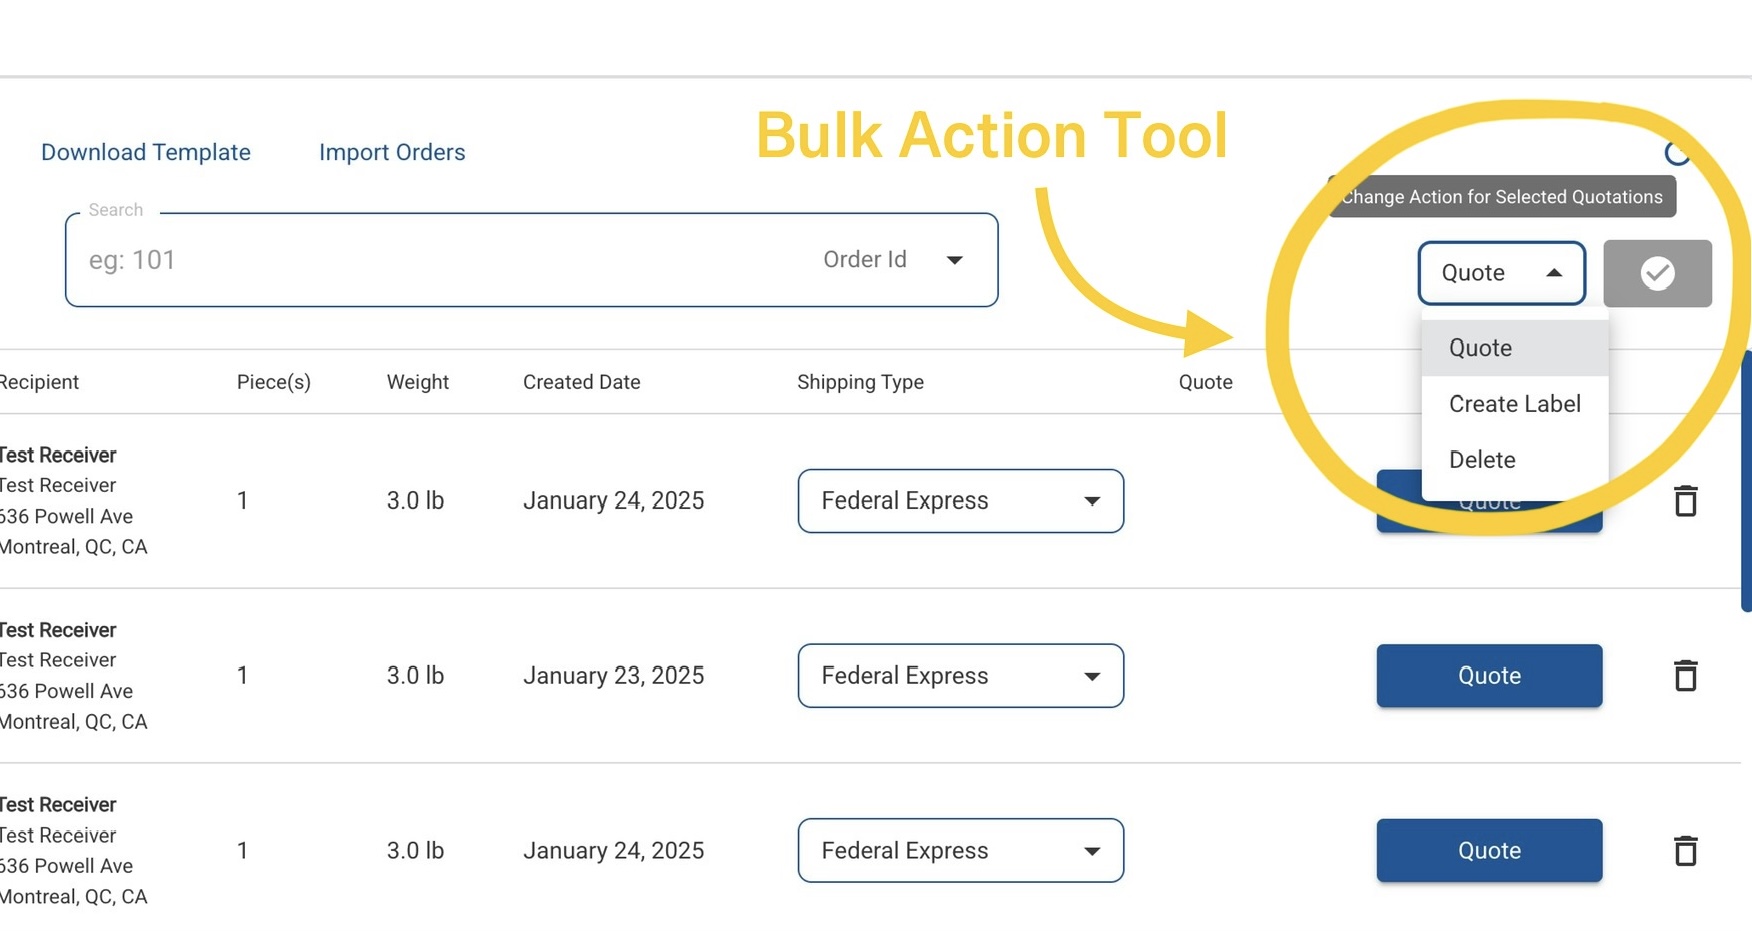
Figure D

Step 4: Click on the quote to see a price breakdown.
Step 4.1:If you forgot an order, or have a last minute order to add, you can also select the plus sign on the top left to create an individual order (shown in Figure E).
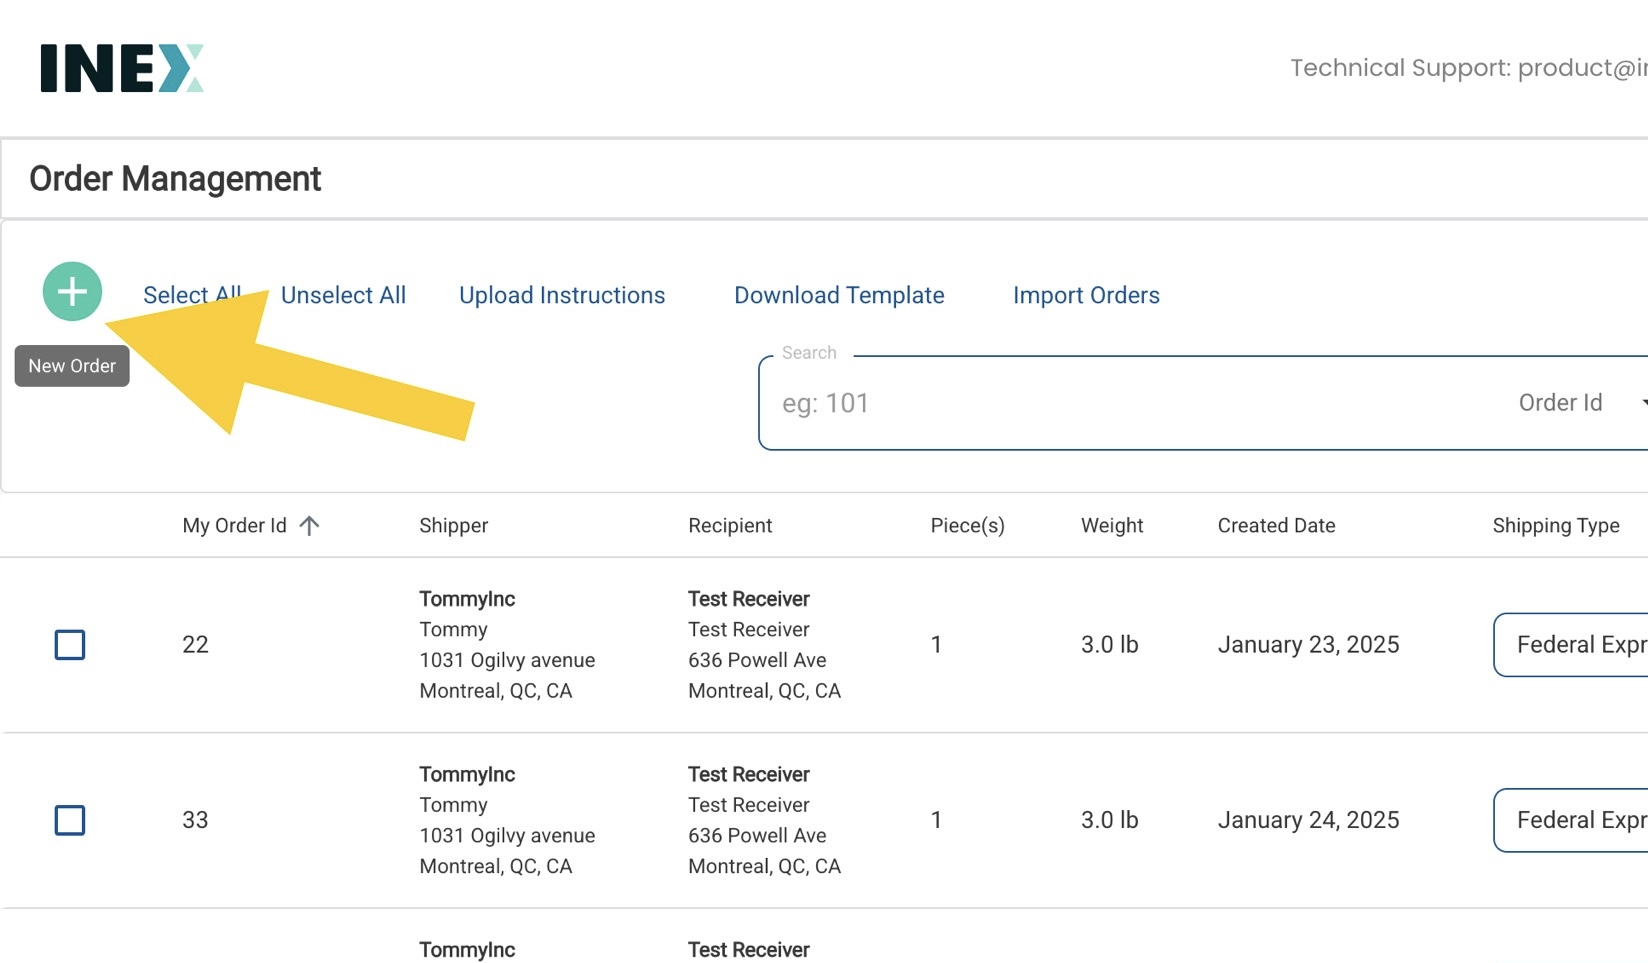
Figure E
Step 4.2: To search for a specific order, use the search bar. You can search for quotes by Order ID, shipper, recipient, or by created date in the drop down on the right of the search bar.
Step 1: Either Select All, or select specific shipments to create labels for.
Step 2: Using the Bulk Action tool, in the drop down select “Create Label”.
Step 3: Click “Validate” and then “Continue”.
Step 4: A window titled “Confirm Order(s)” will pop-up after you request label(s) to be created. View the total cost in the top right.
Step 5: Please review tabs labeled “Valid Orders” and “Errors”. Quotes in the “Errors” tab failed their validation and here you can read the error message and fix your quote. For example, as shown in Figure F, if there is an error message that reads, “Phone number too long,” shorten the phone number, re-quote, and re-create the label.
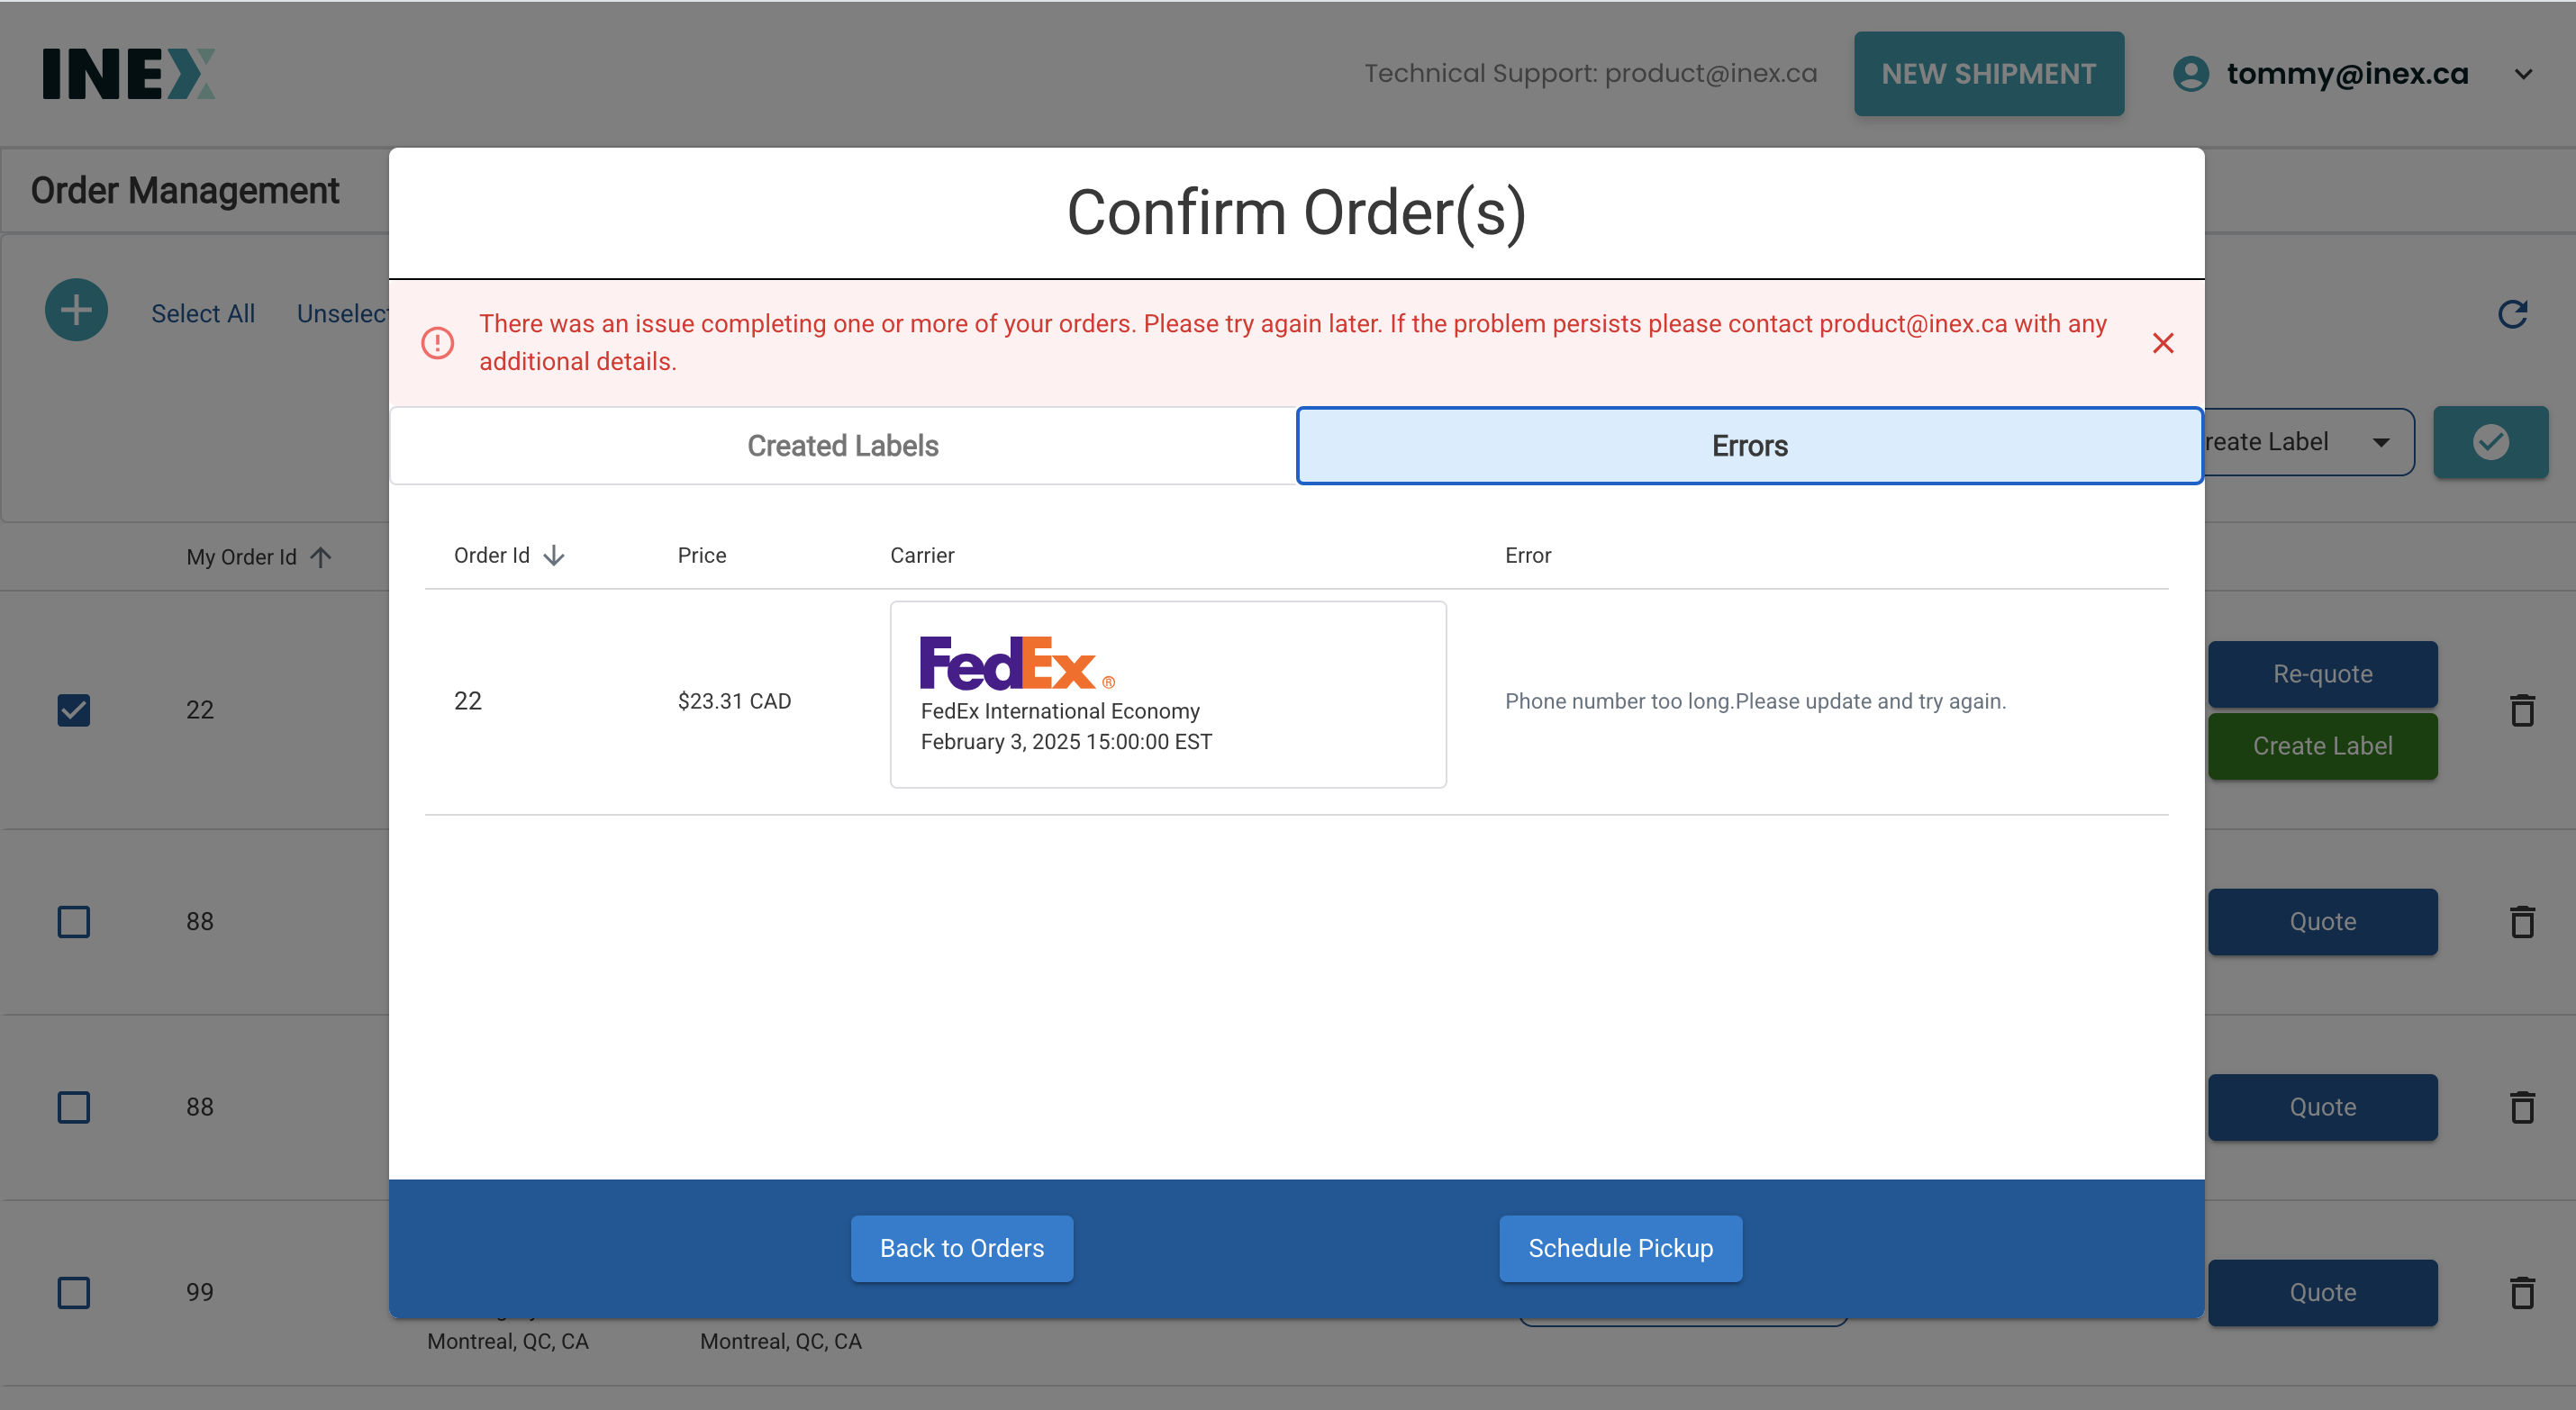
Figure F
Step 6: If there are any orders you don’t want to include last minute, you can press the ![]() to remove them.
to remove them.
Step 7: Click “Pay”.
Step 7.1: View created labels and any errors that appeared.
Step 7.2: If you have an order in the errors tab, there is something wrong with the details.
Step 7.3: Next you can schedule any pickups for these newly created shipments.
Step 1: Click on the drop down menu next to your email and select “My Shipments”.
Step 2: Labels ready to be printed will appear under the tab “Ready,” while already downloaded labels will appear under “Printed” tab.
Step 3: To place a label back in “Ready” click the restore icon on the left (shown in Figure G).

Figure G
Step 4: View your domestic and international orders via the two tabs, 🏠 & 🌎 (shown in Figure G)
🏠 = Domestic Orders
🌎 = International Orders
Step 4.1: You cannot apply actions to orders in both tabs simultaneously.
Step 5: If you check “Only Print Thermal Labels,” you will exclude non-thermal documents. Non-thermal documents can include commercial invoices, for example.
Step 6: Press “Select Max” to print all of your labels.
Step 7: When printing labels for a shipment that has a commercial invoice, the commercial invoice will be generated as a second separate PDF. After pressing “Print Selected,” your label(s) and commercial invoice(s) will pop-up in two separate windows.

Our Bulk Shipment Management System supports the following:
Welcome to Inex! We value your privacy and want to ensure a transparent and enjoyable browsing experience on our site.
How We Use Cookies:
We use cookies to enhance your experience, provide essential functionalities, and understand how you interact with our website. This includes personalizing content, offering social media features, and analyzing our traffic. We also share information about your use of our site with our social media, advertising, and analytics partners.
Your Choices:
By clicking ‘Accept’, you consent to our use of cookies for the purposes mentioned.
Privacy and Transparency:
We respect your privacy rights and are committed to protecting your personal information. For more details about our cookie usage, please visit our privacy policy.